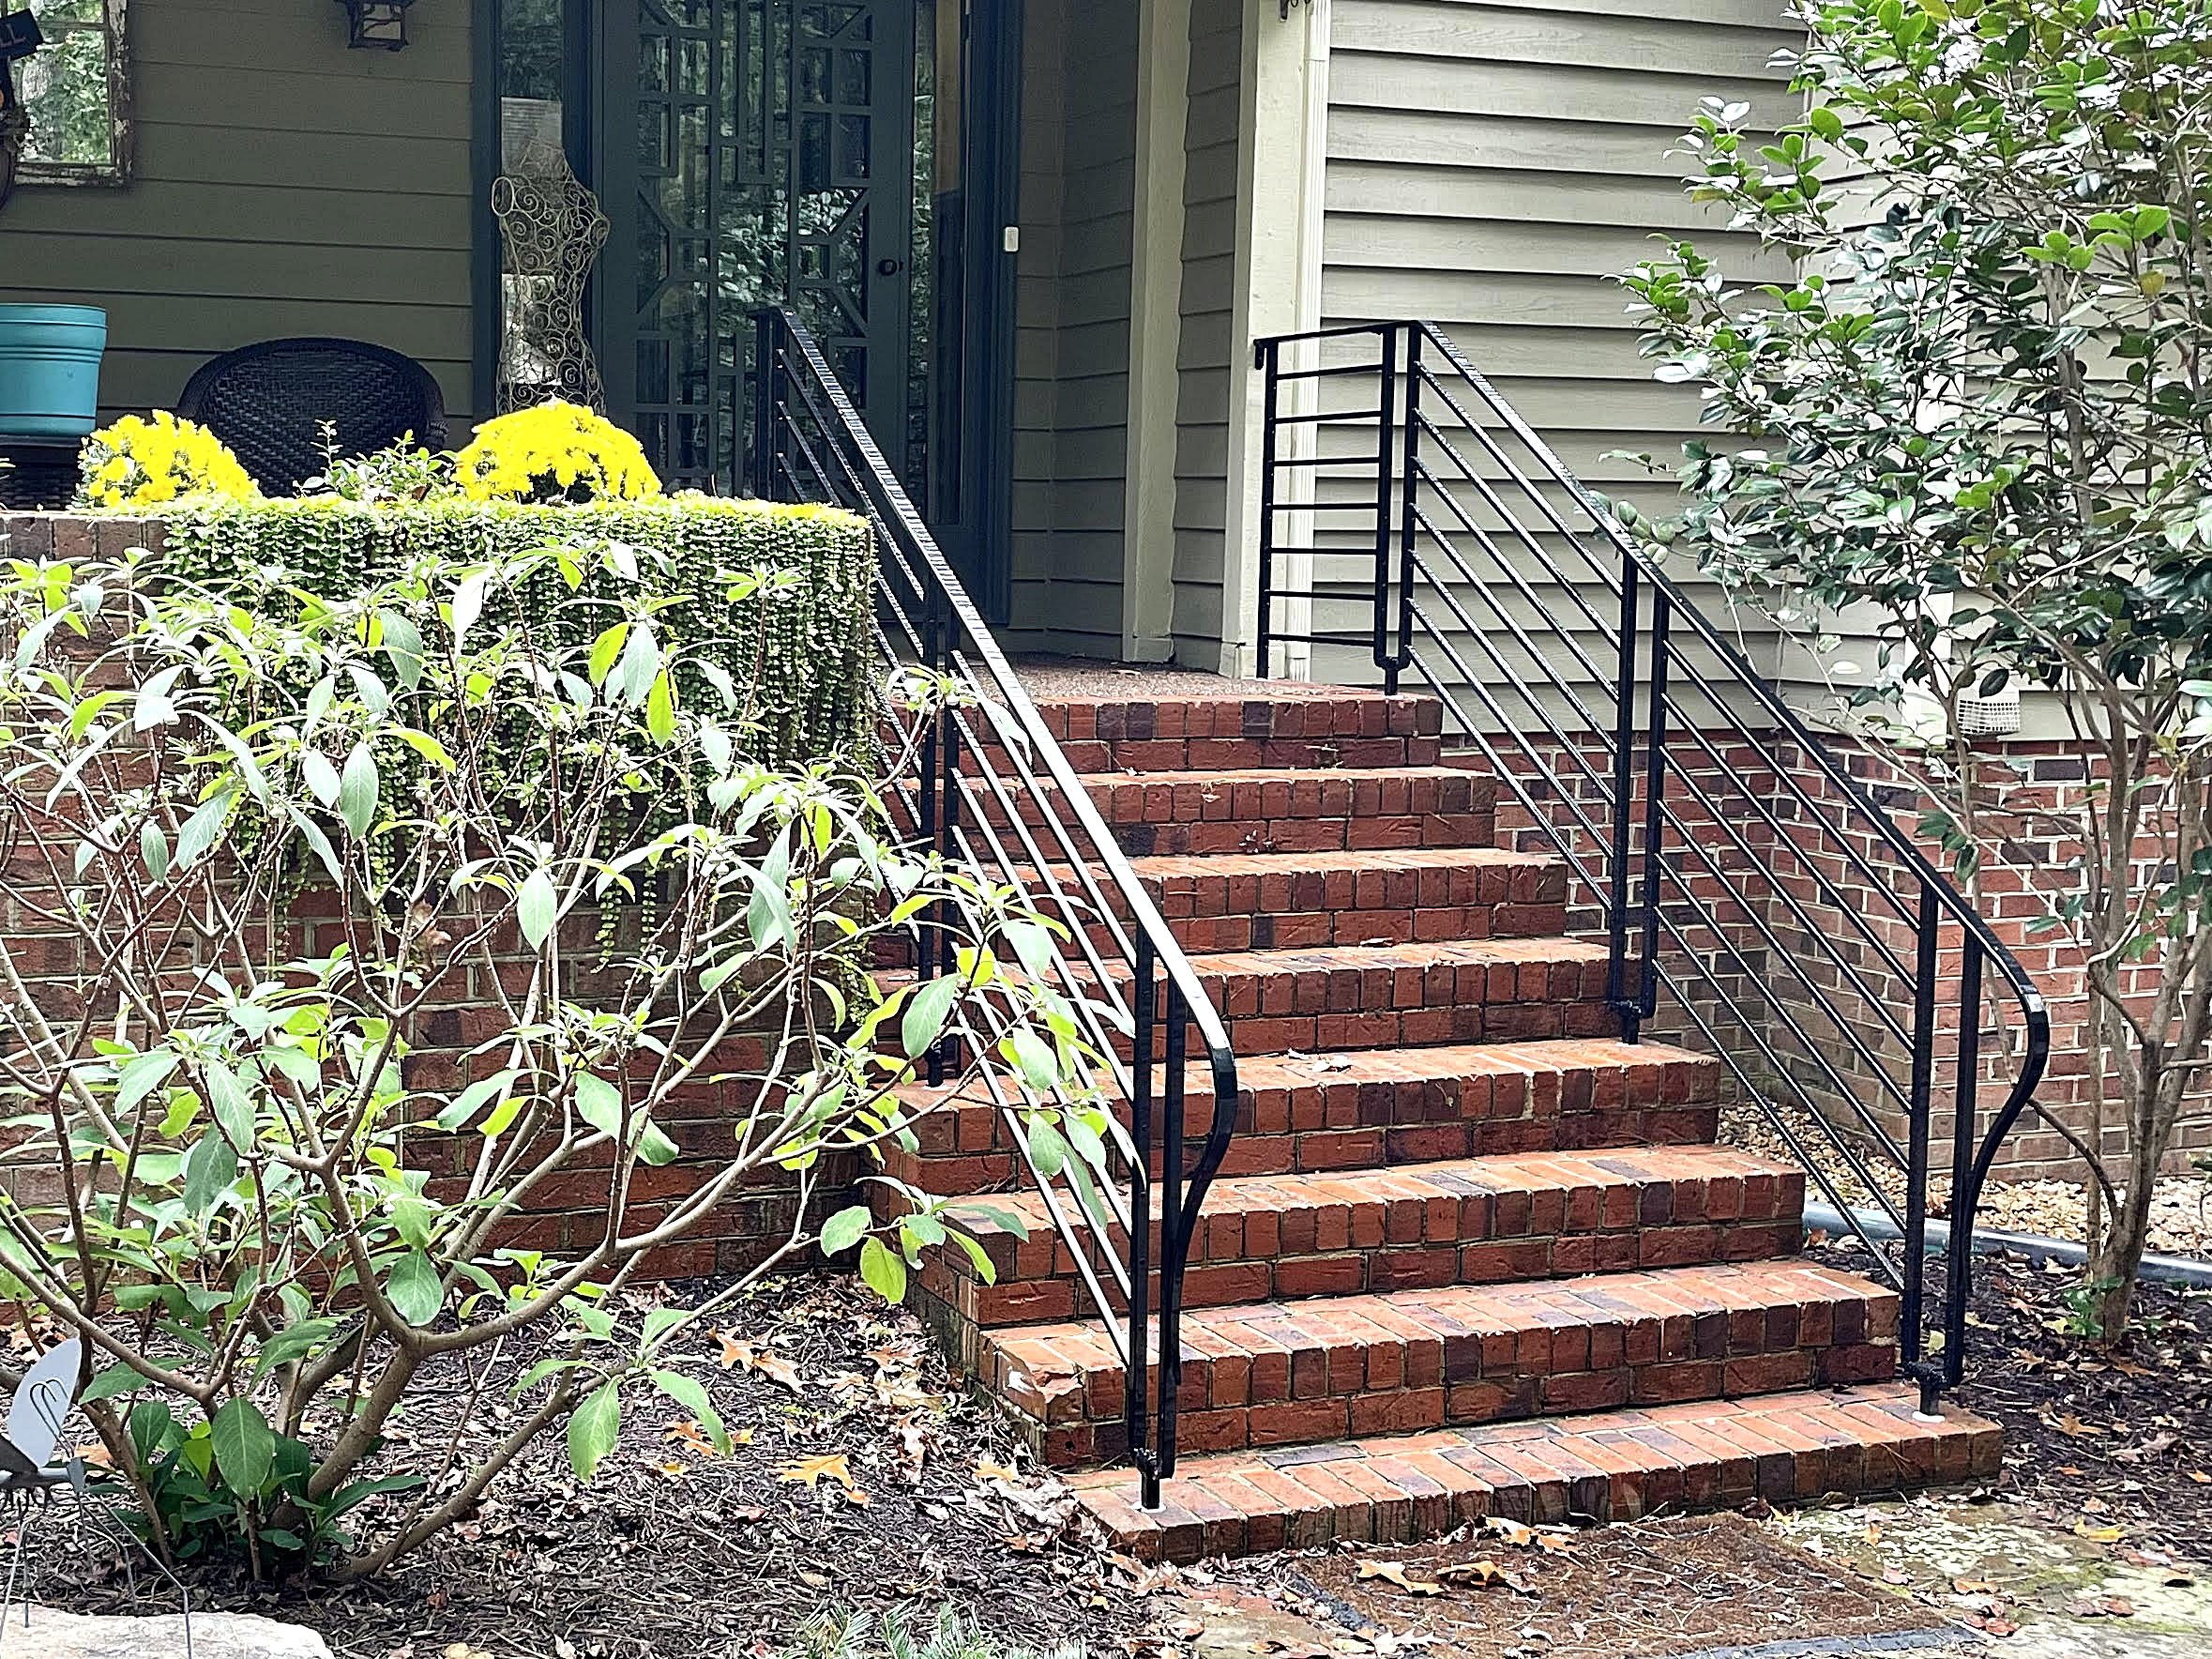
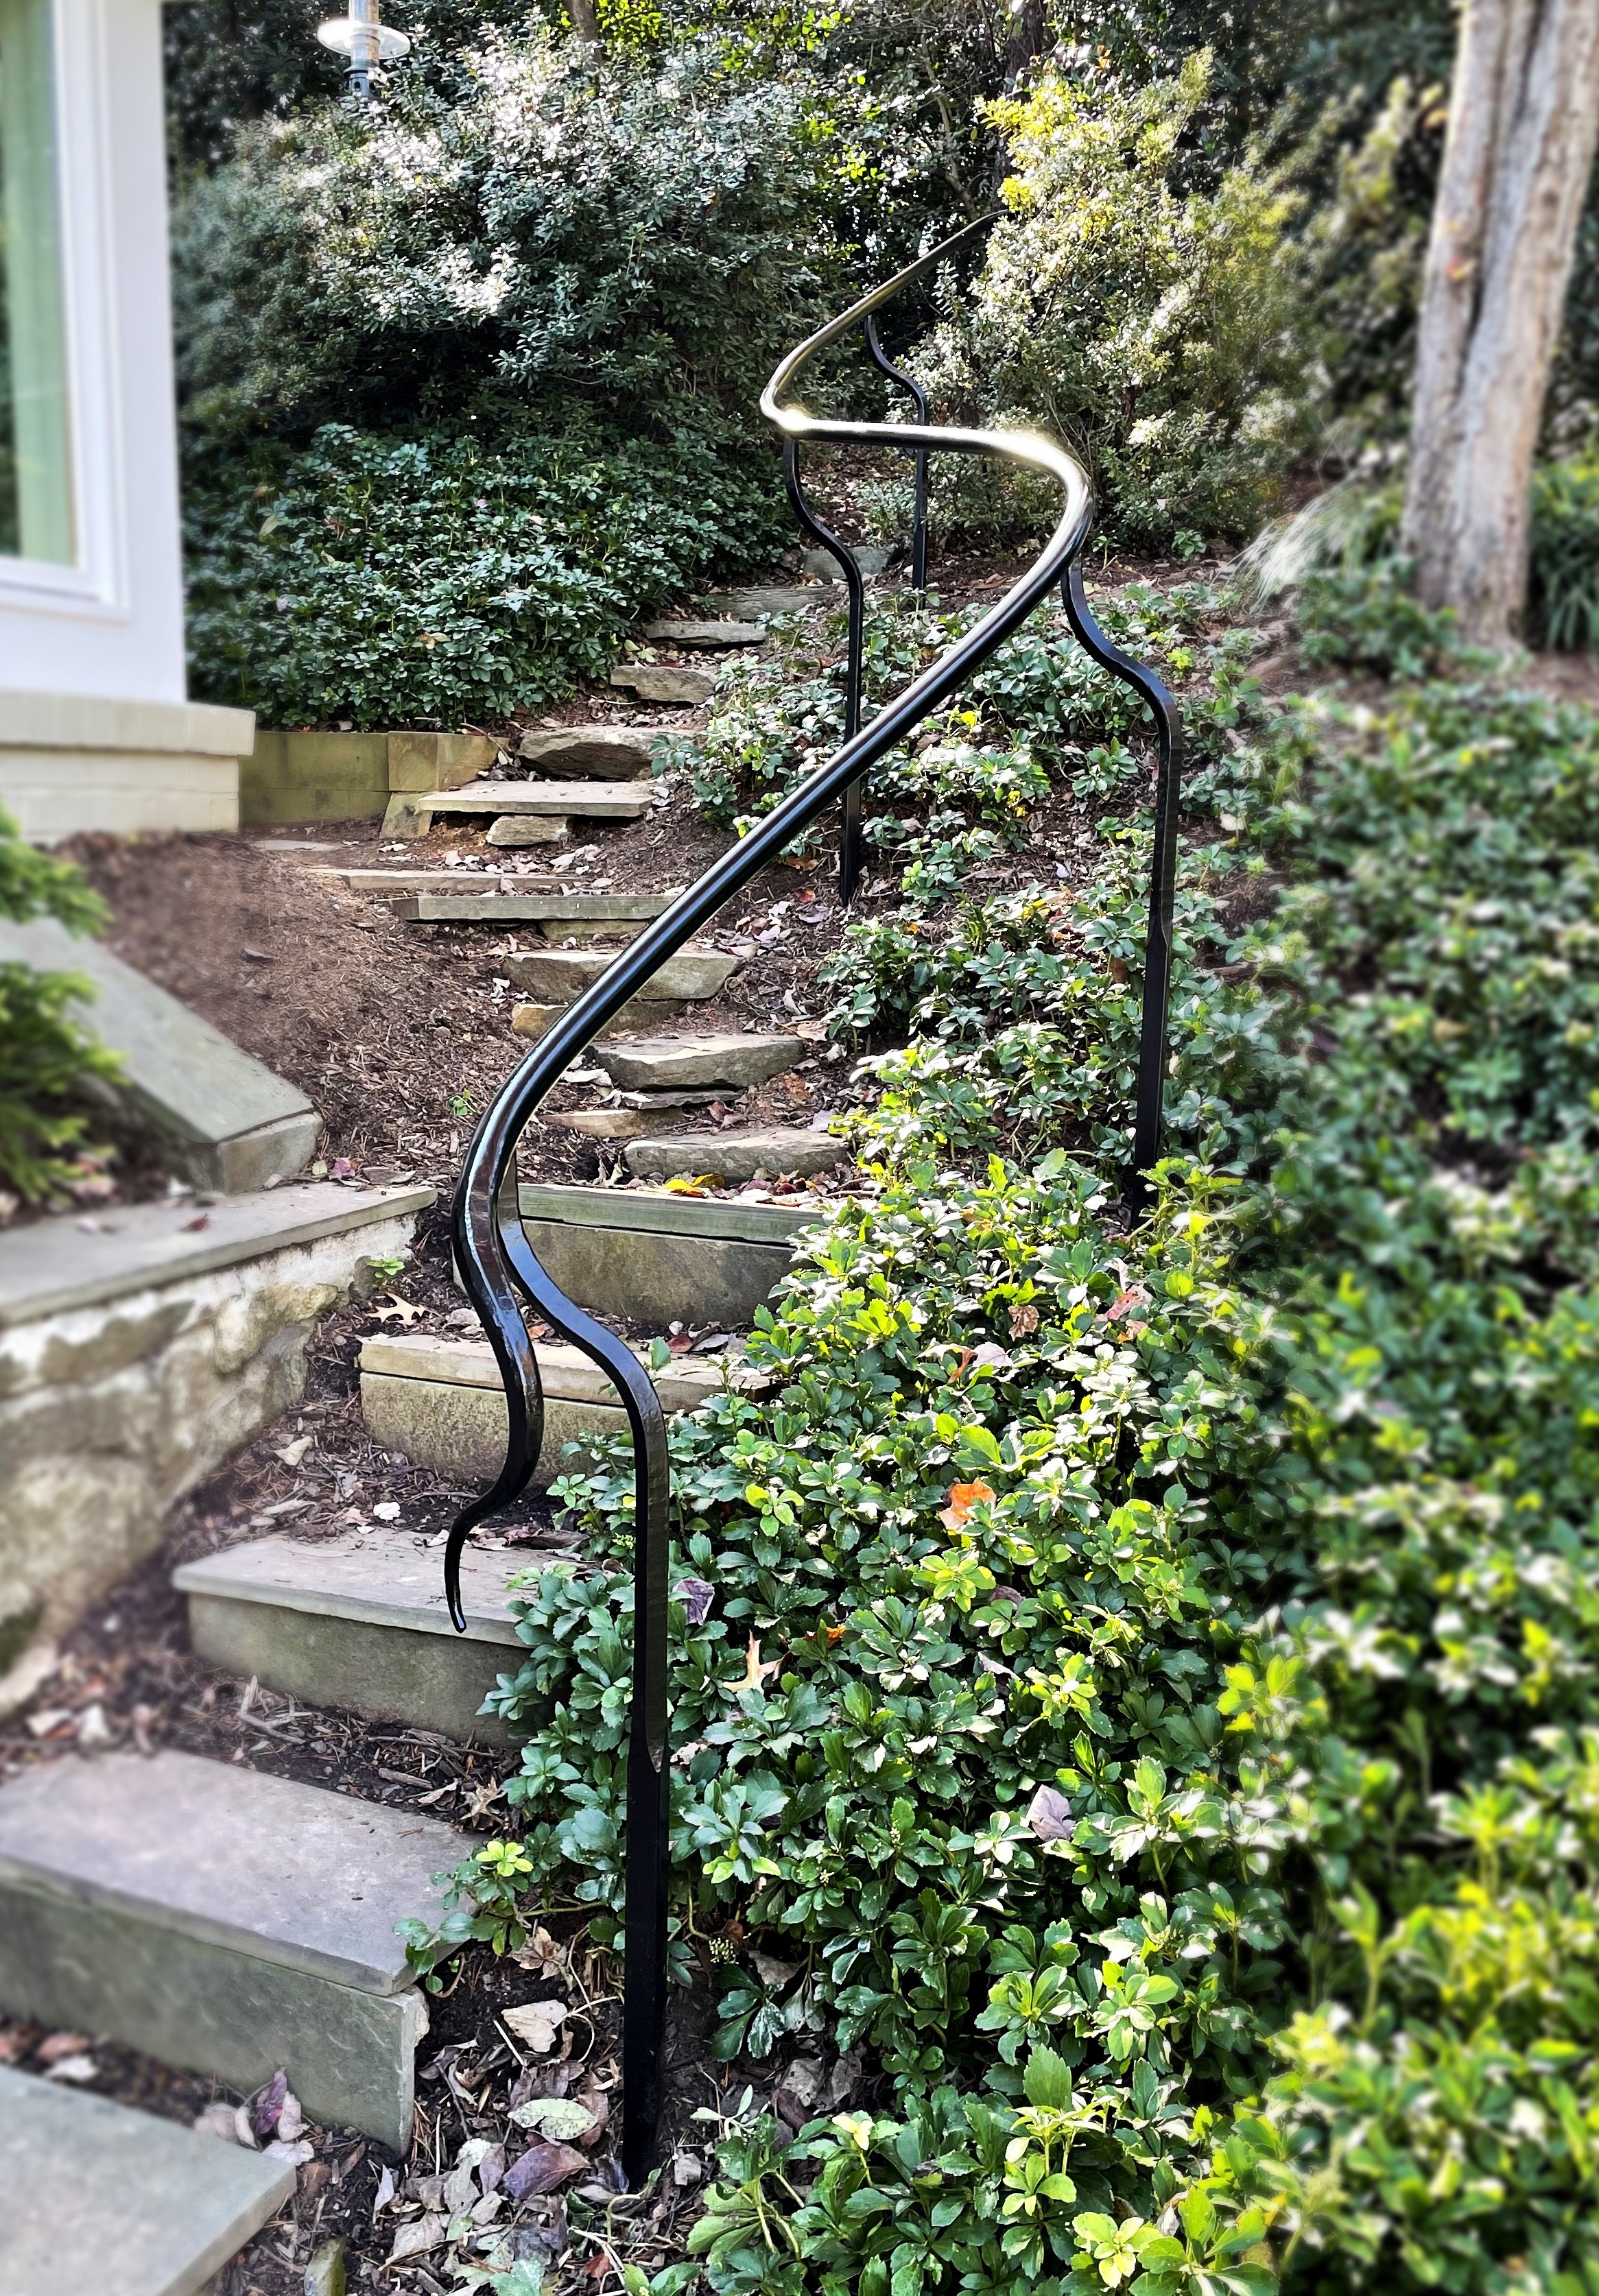
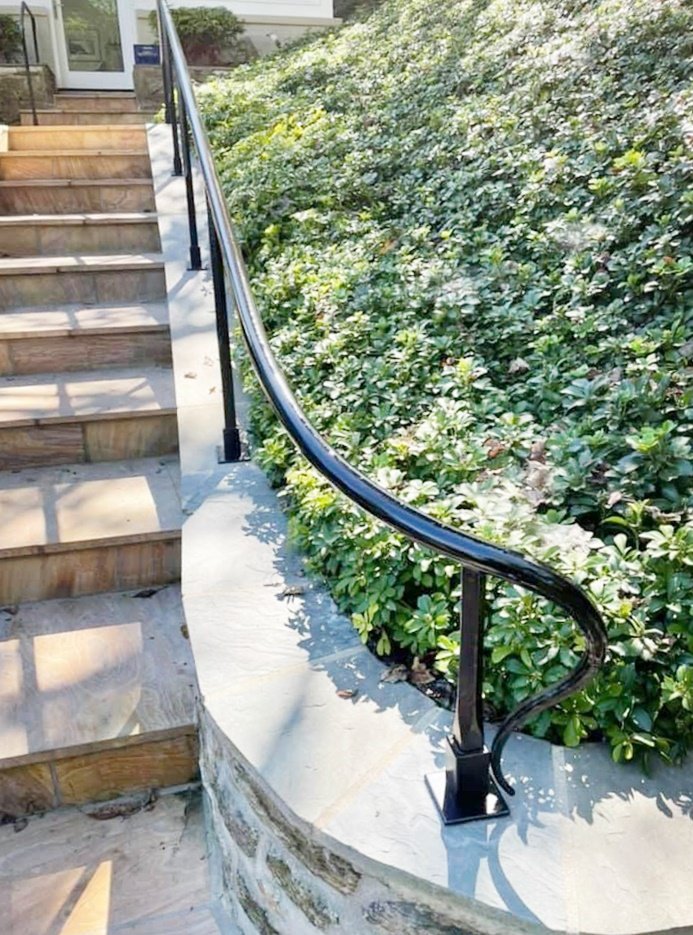
Railing with Many Stairs

Kyle designed this series of forged, minimalist hand railings for a home located on a hillside.

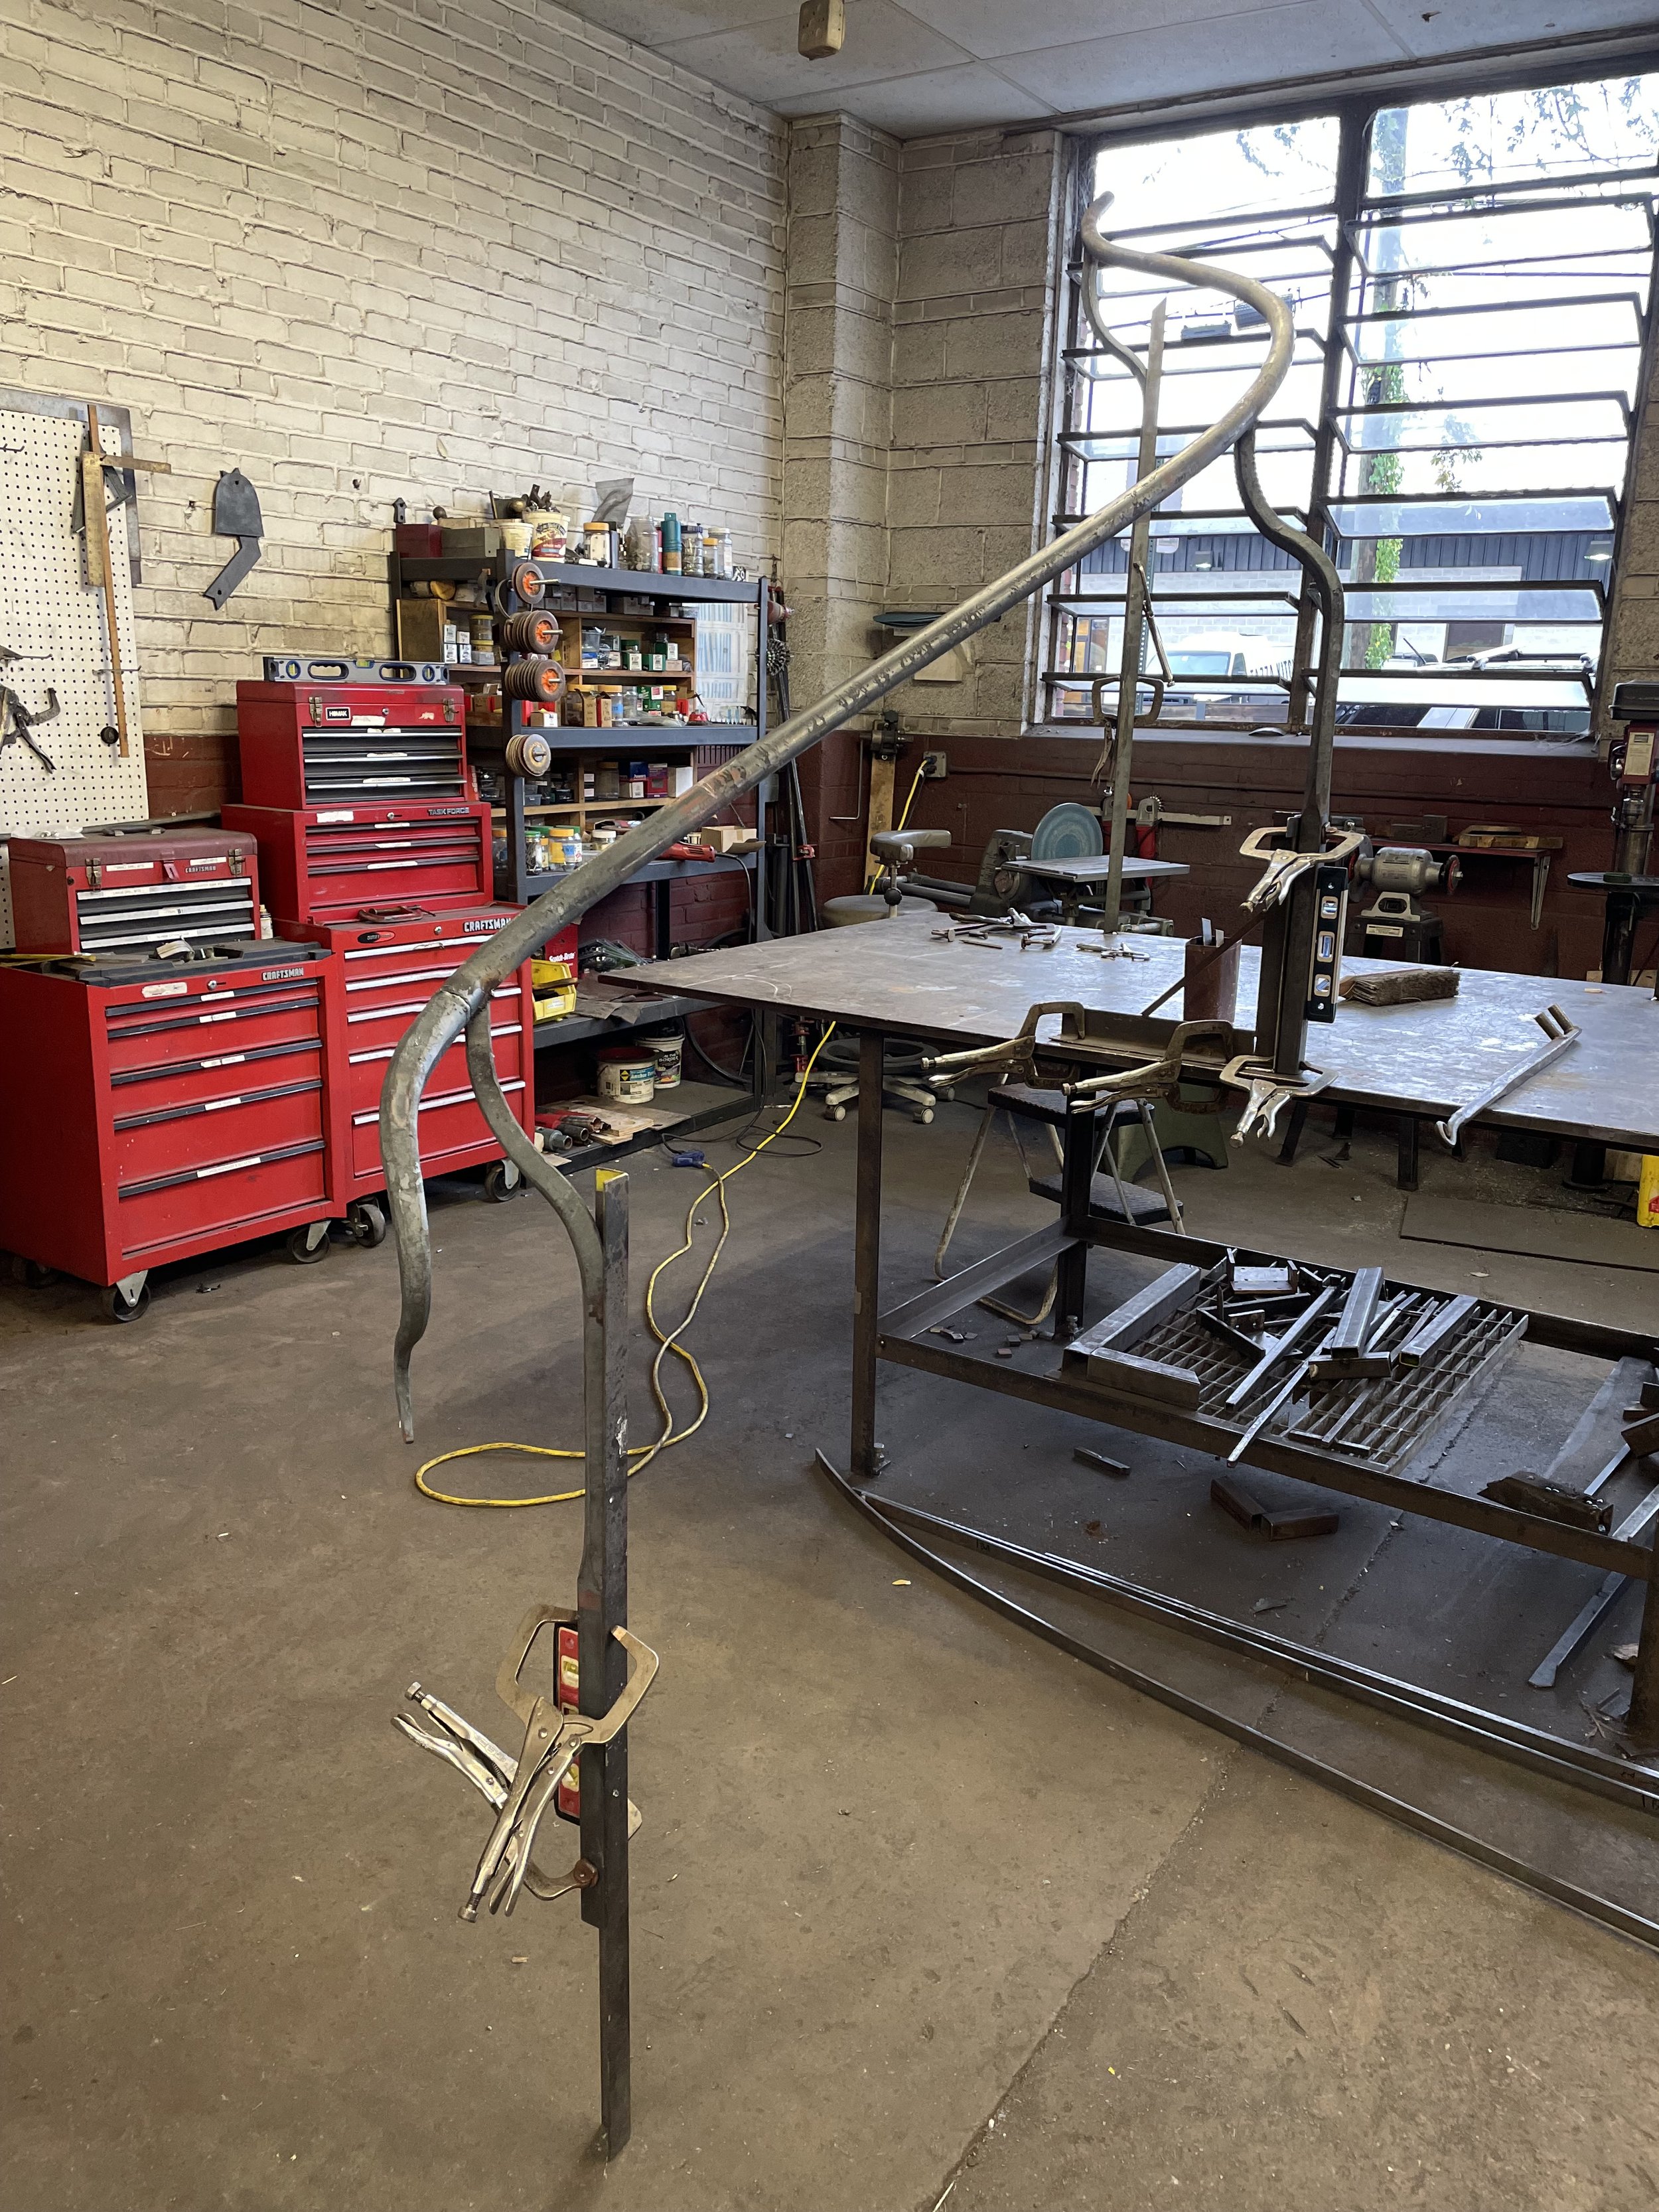
The terraced steps and curving lines of the property provided an interesting challenge. Each railing required custom measurements and templating to fit the various spaces.

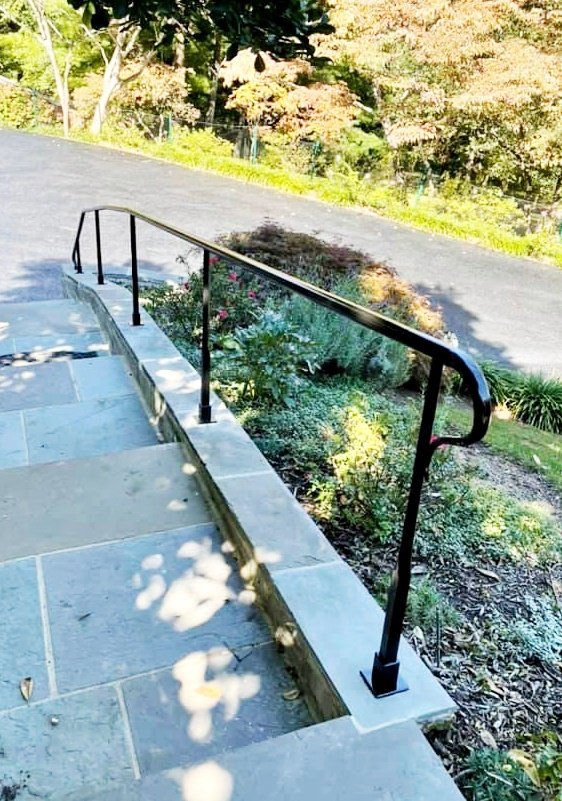
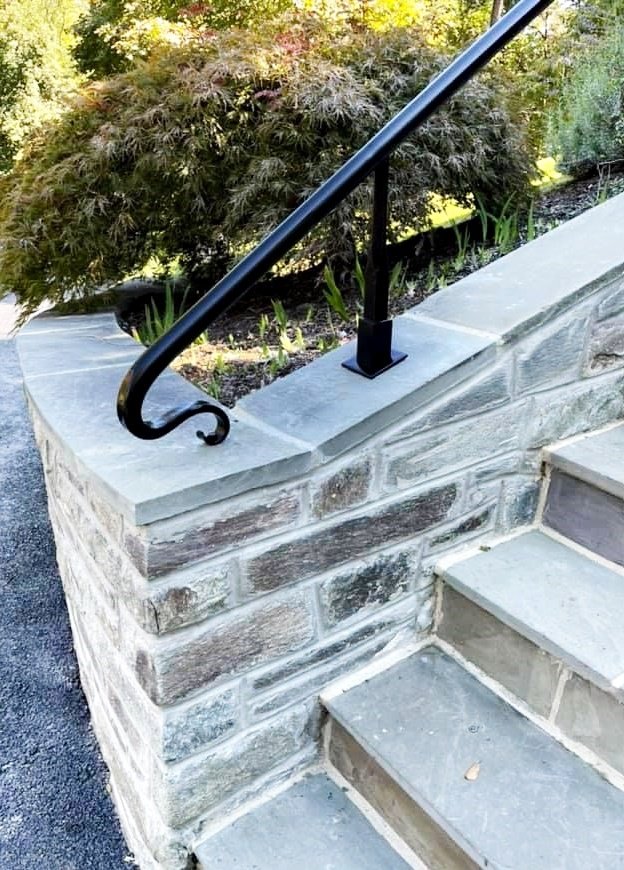
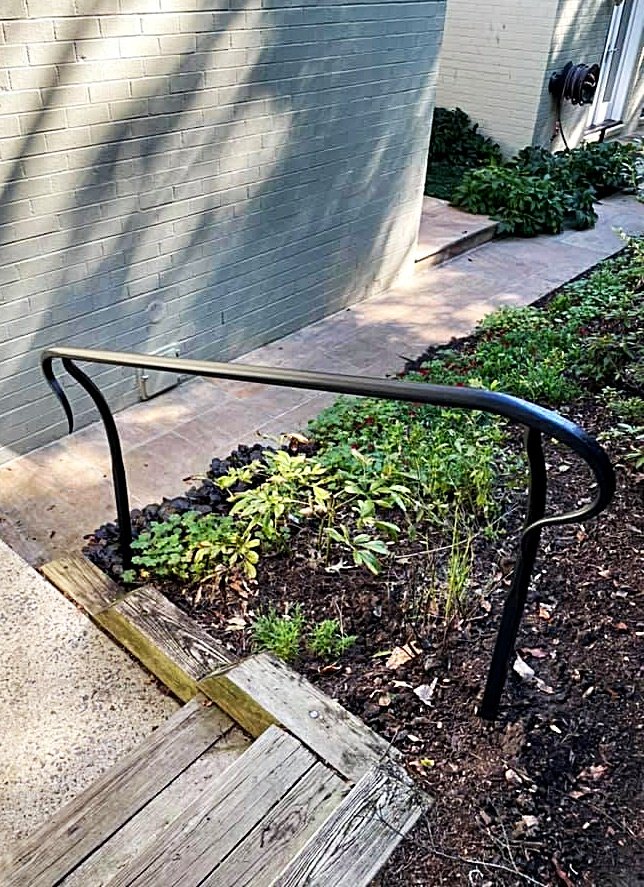
The result is a series of railings ranging from winding, organic lines to more traditional forms, tied together with a cohesive style.

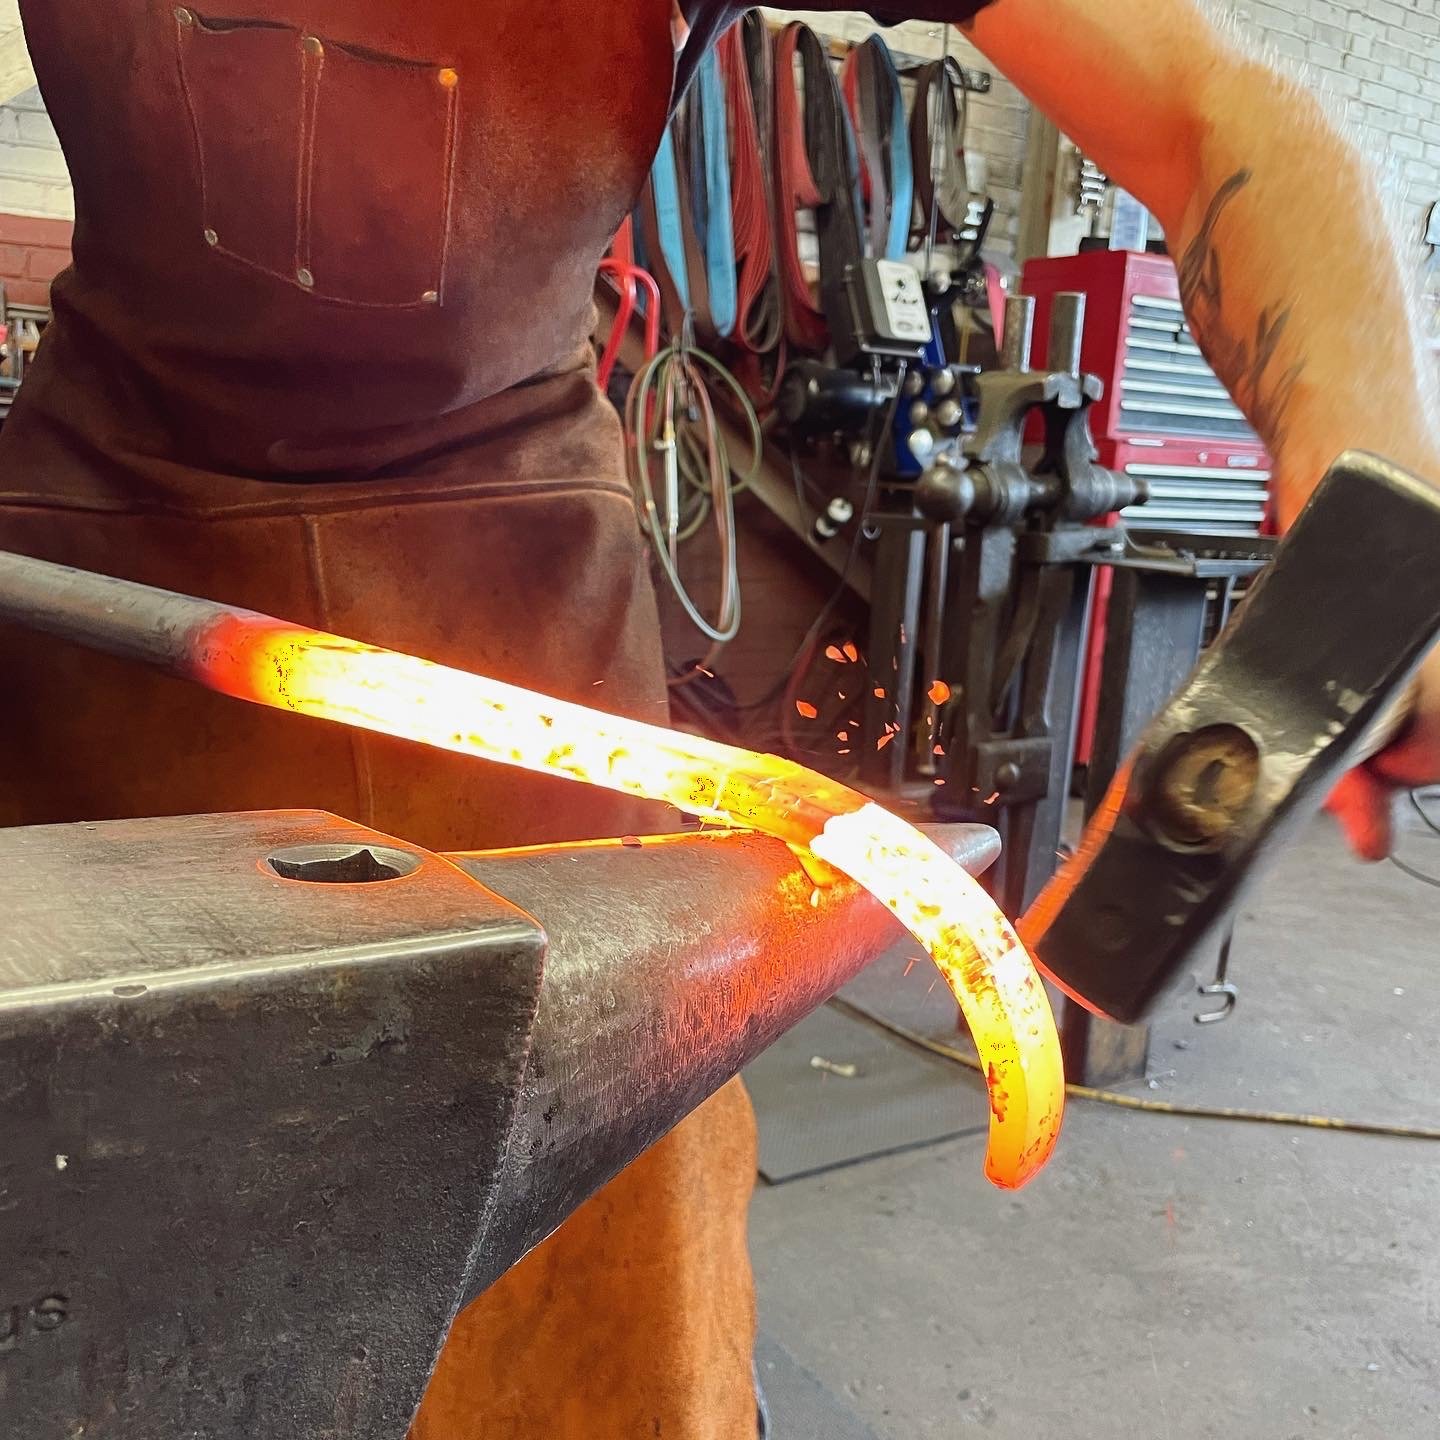
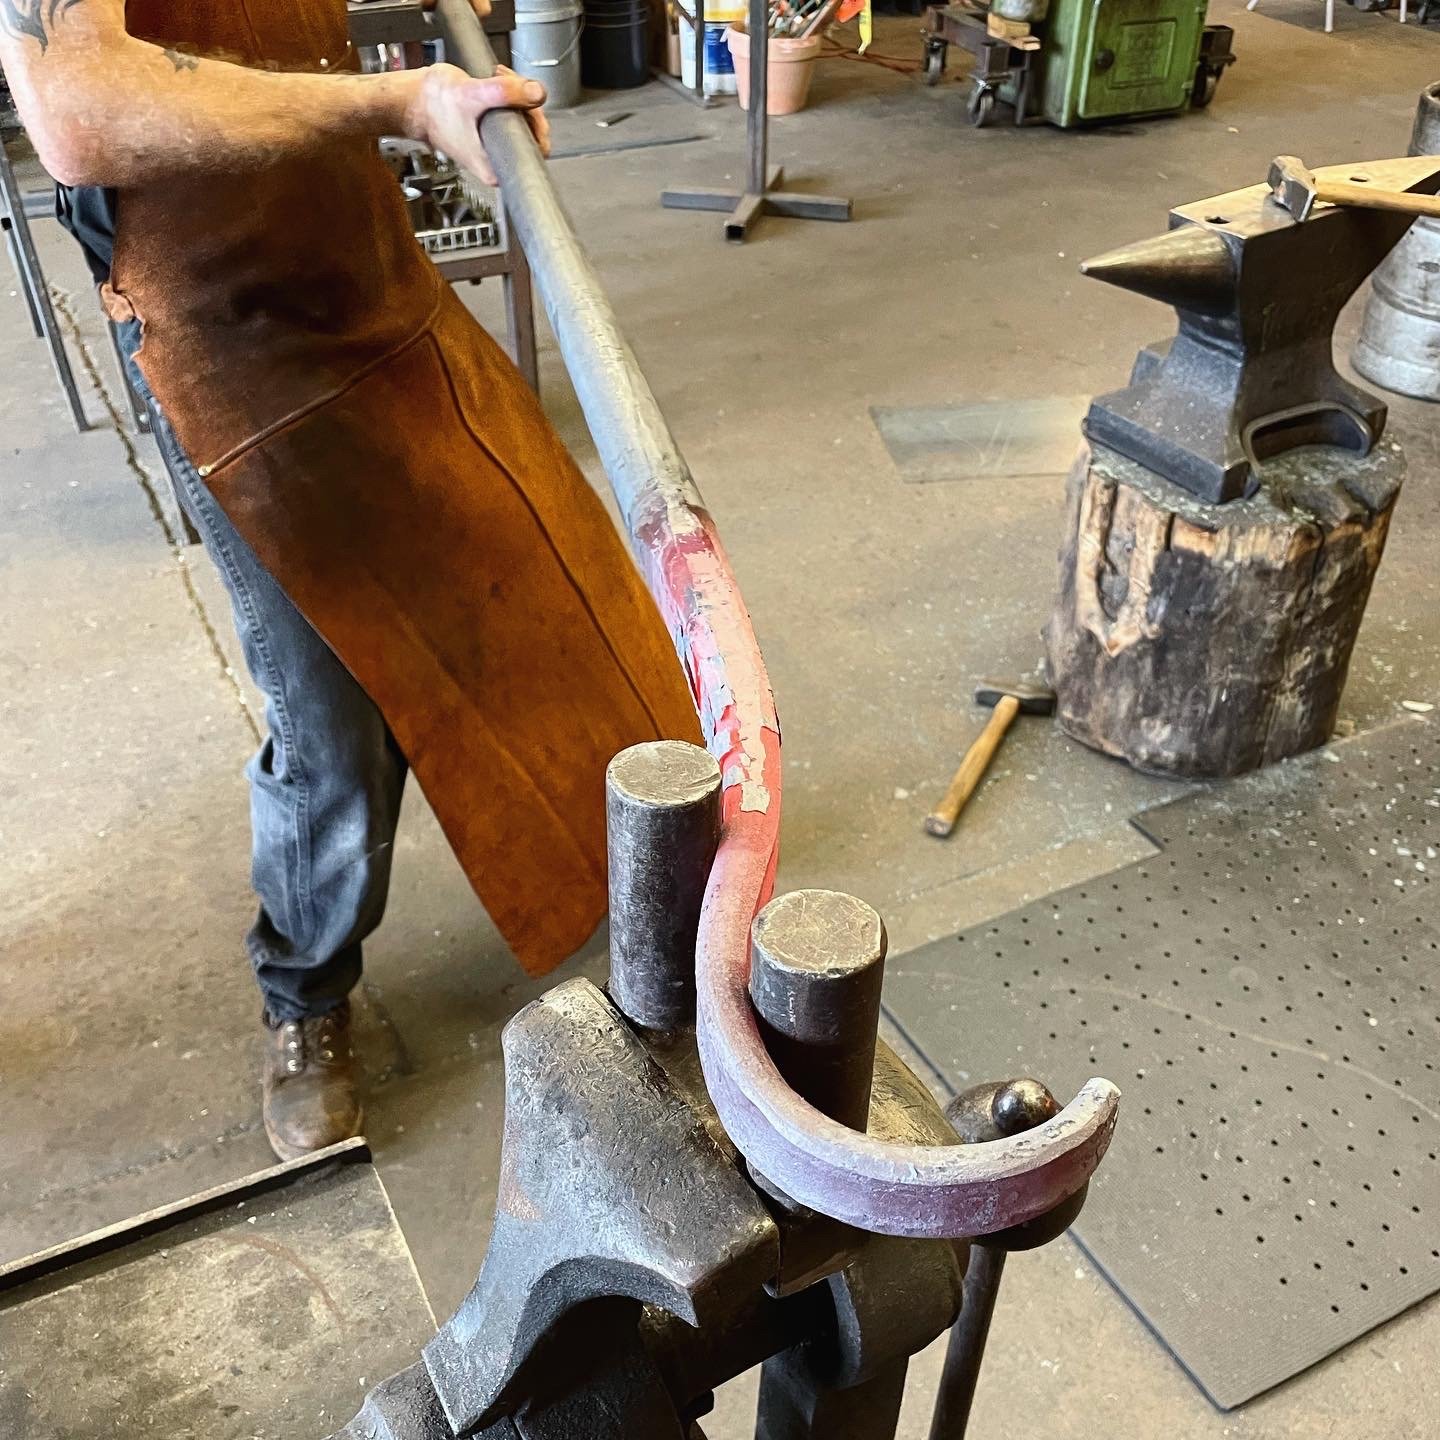
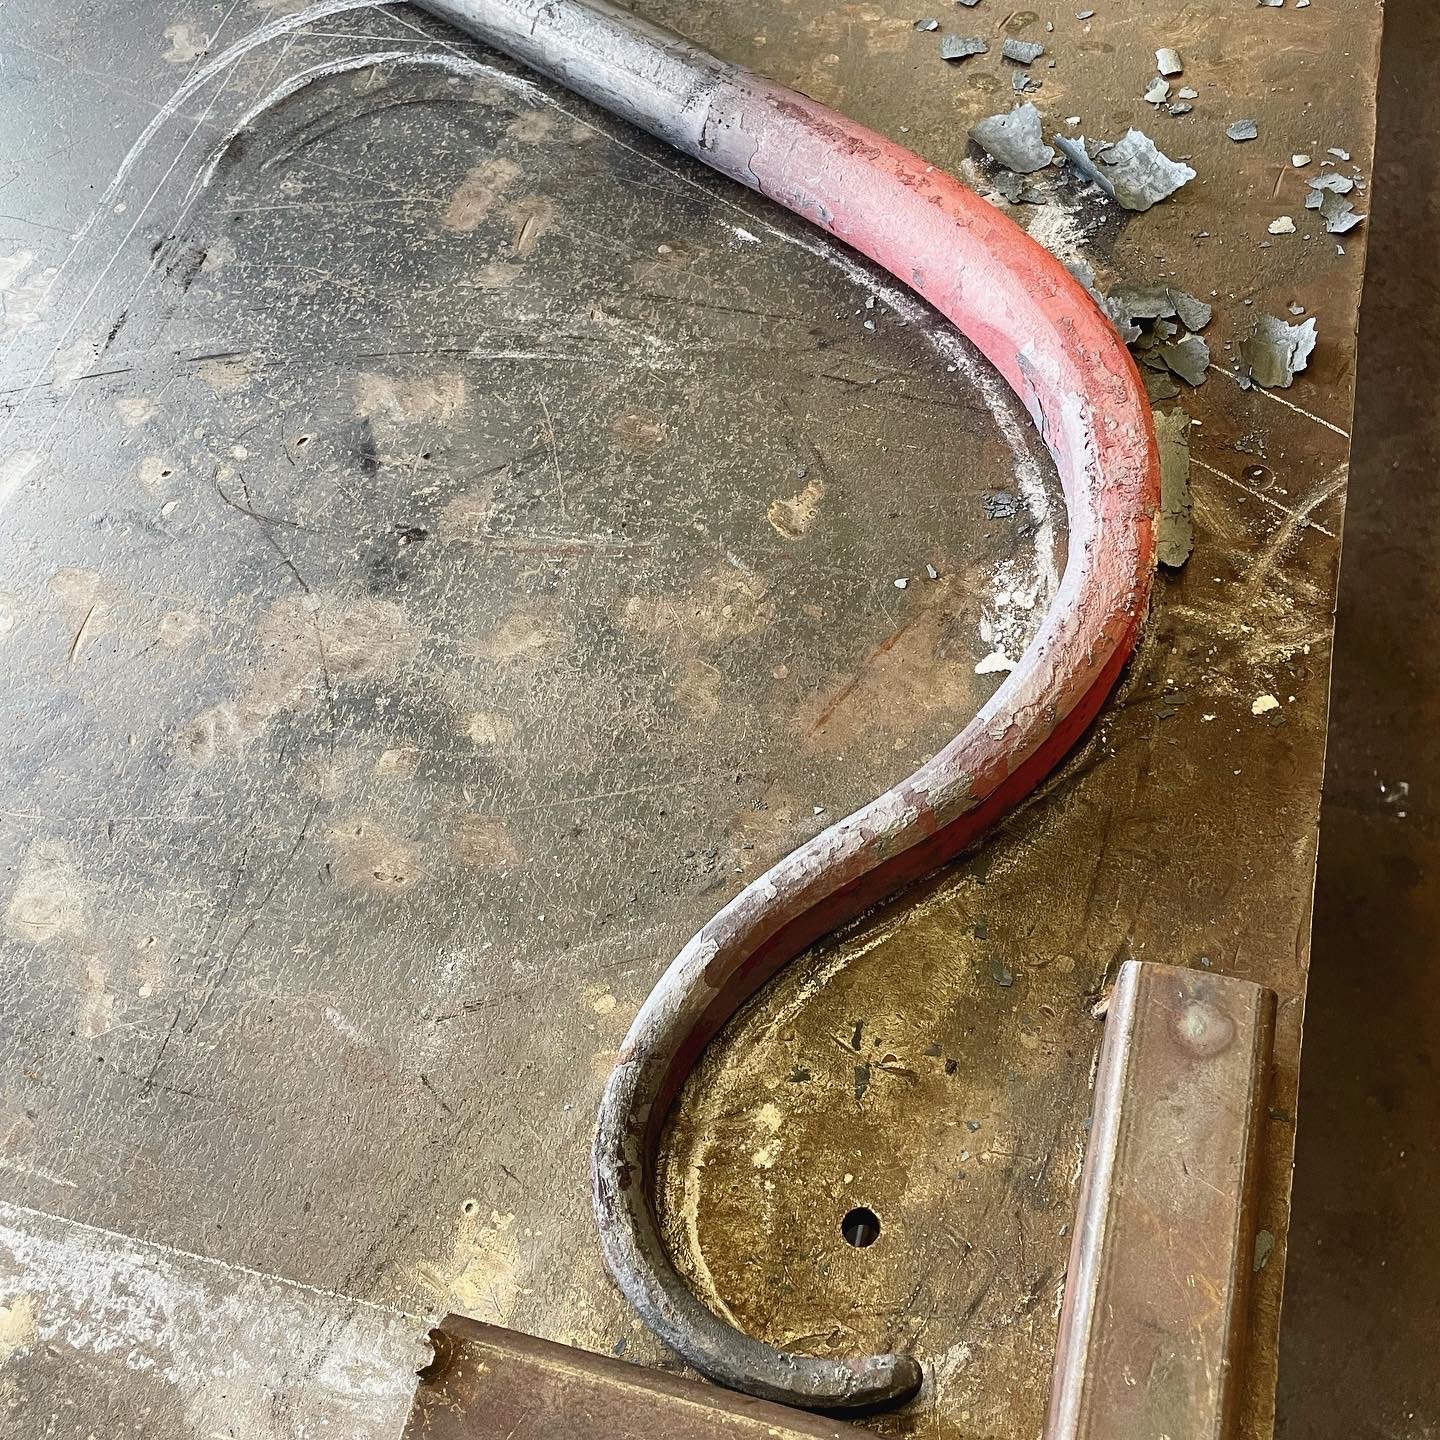
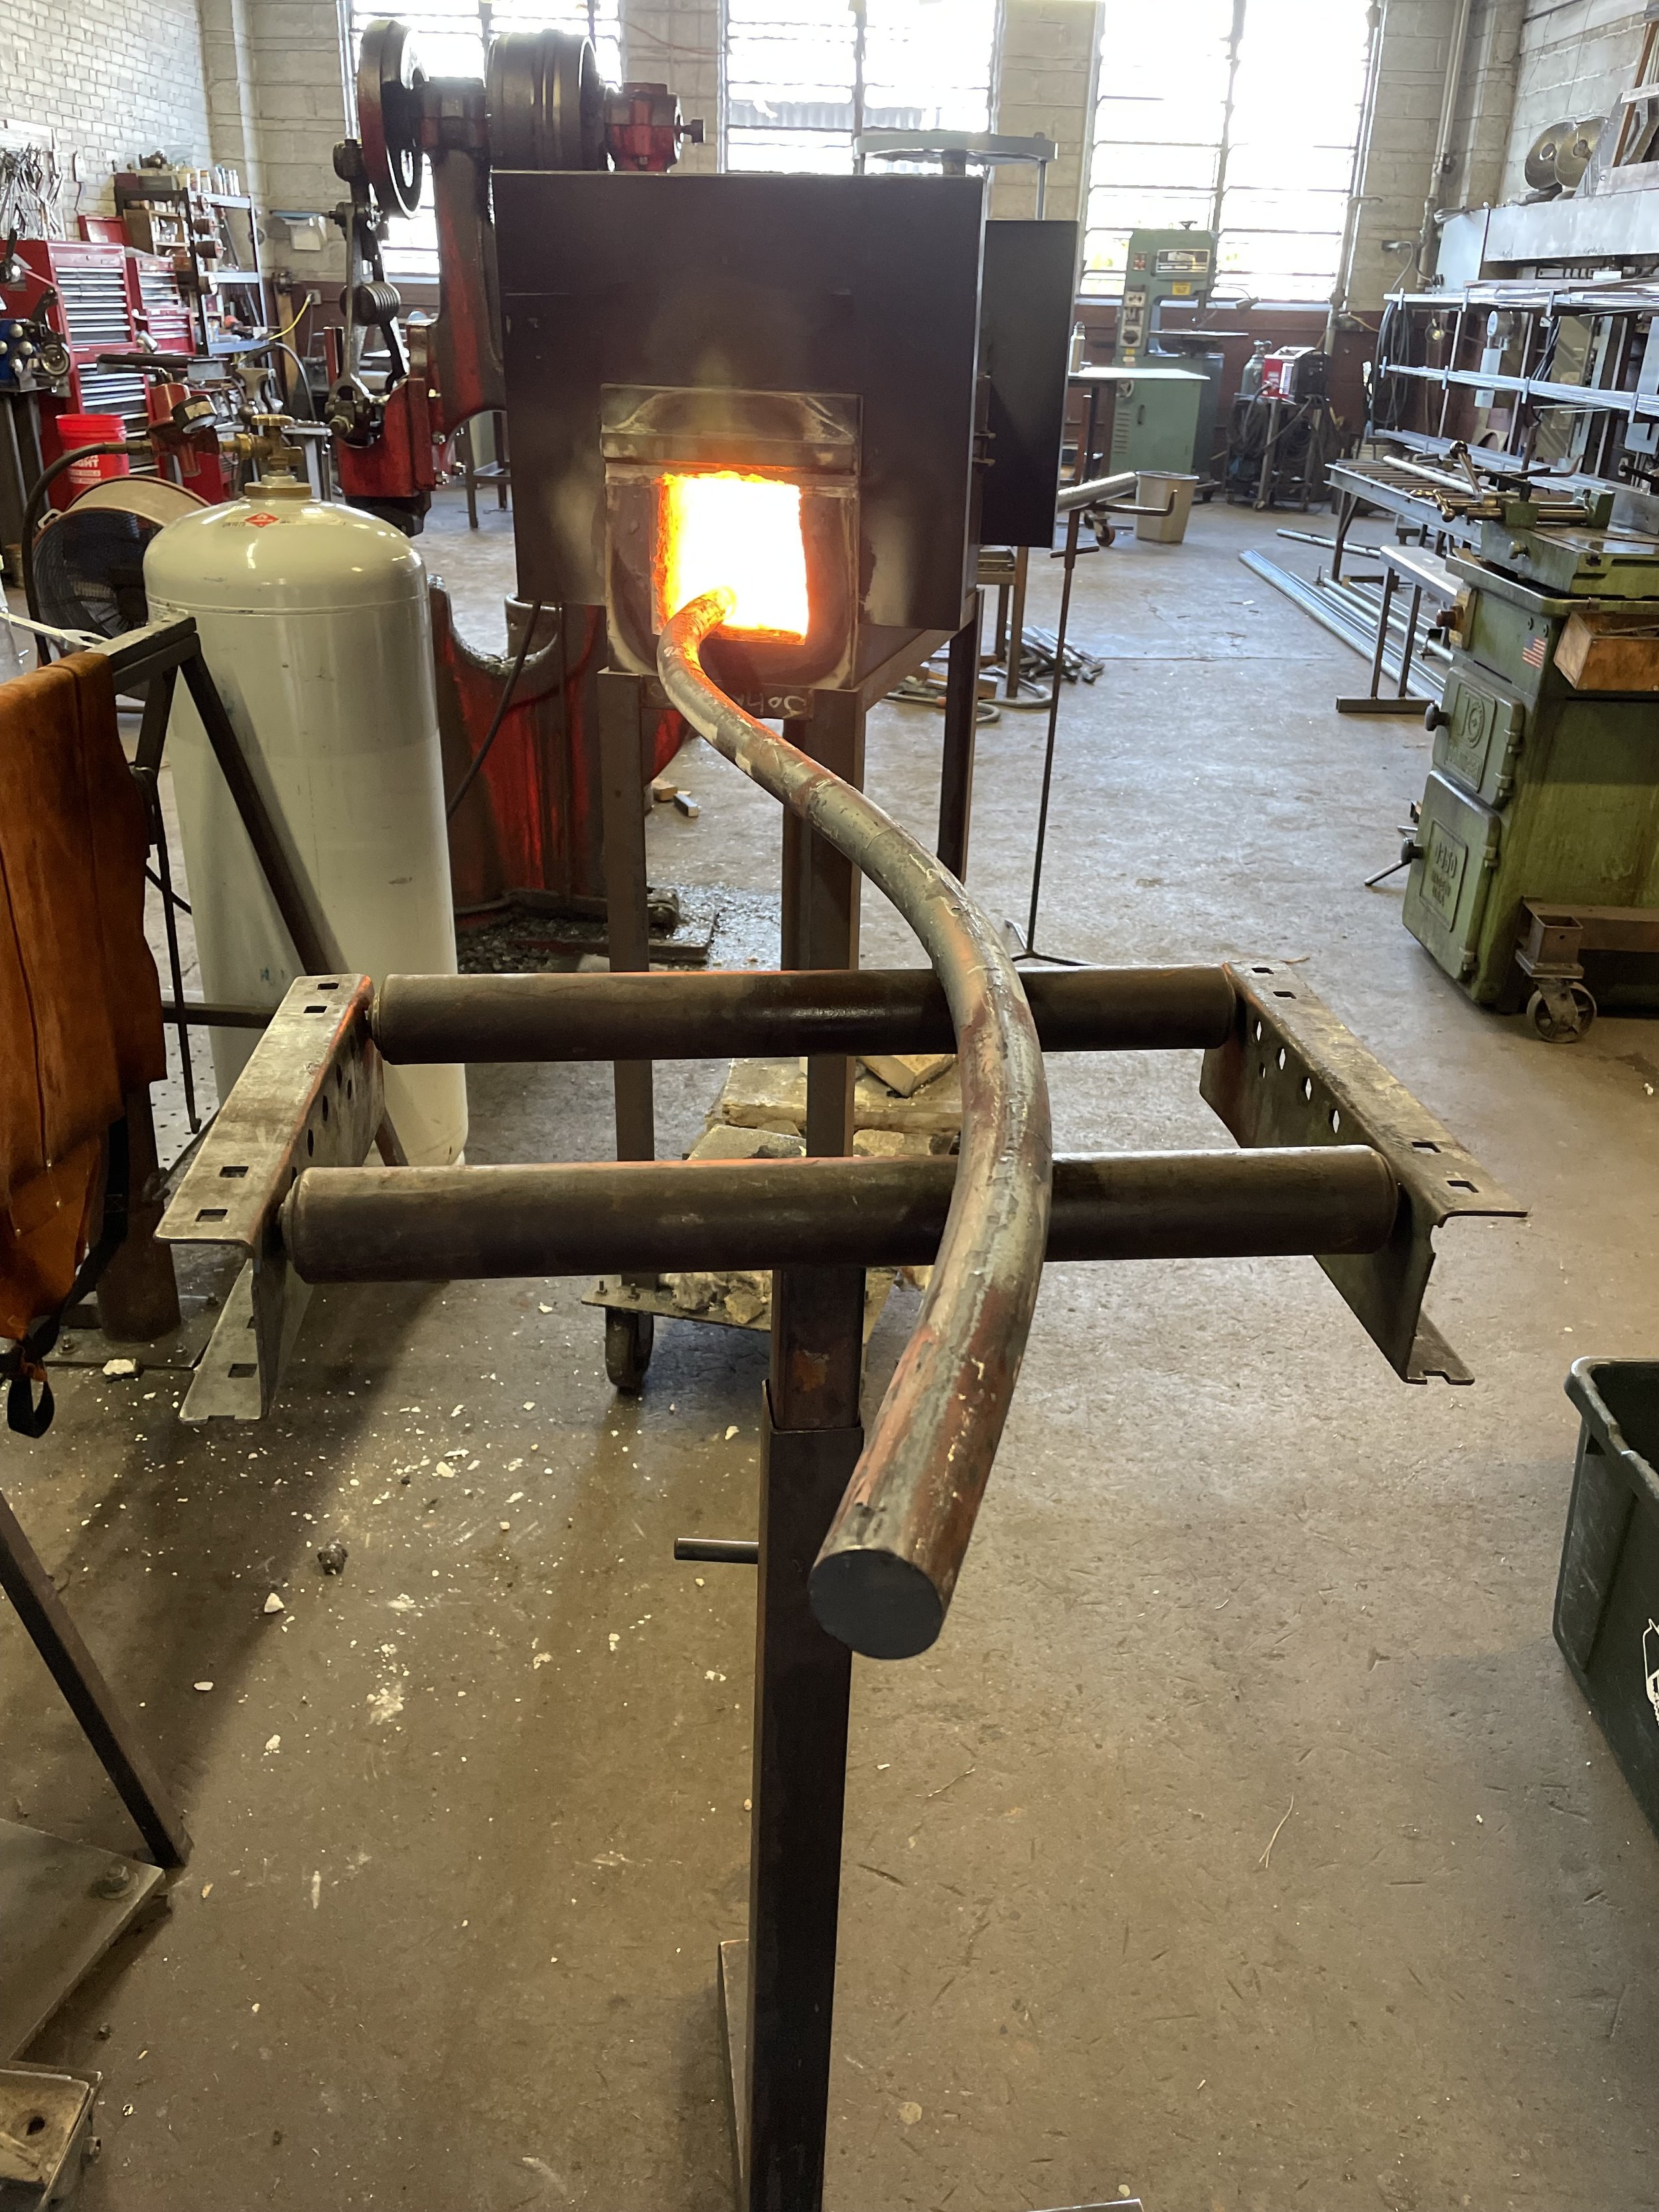
We made this video to share on social media while Kyle and his team were forging some of the railing components. We were in the midst of a heat wave here in Virginia, so the Bananarama song “Cruel Summer” seemed a particularly fitting soundtrack.

Forging custom railing.

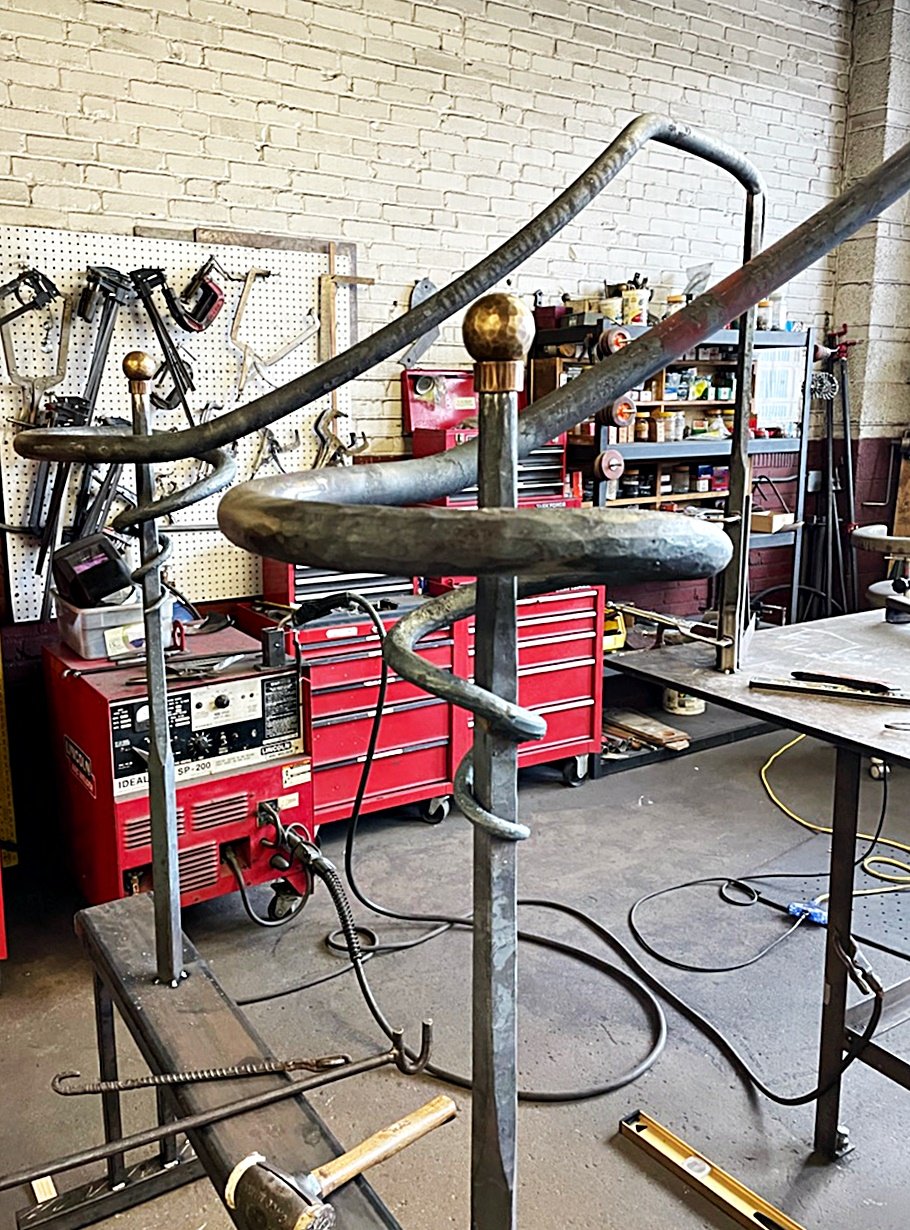
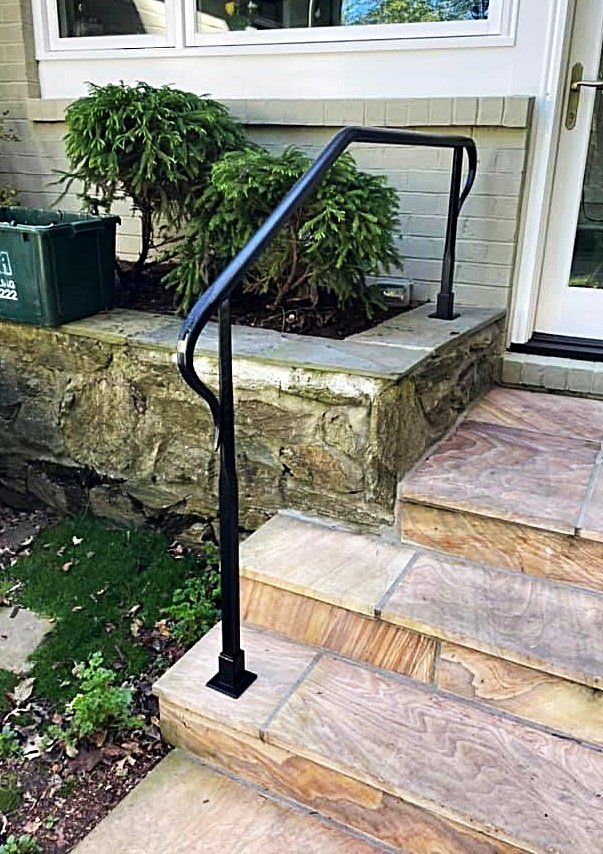
For the entrance to the home, Kyle designed a relatively spare set of hand railings in the same style. He added a spiral flourish to the end plus a hand-forged bronze finial to give this set of railings a bit of presence.

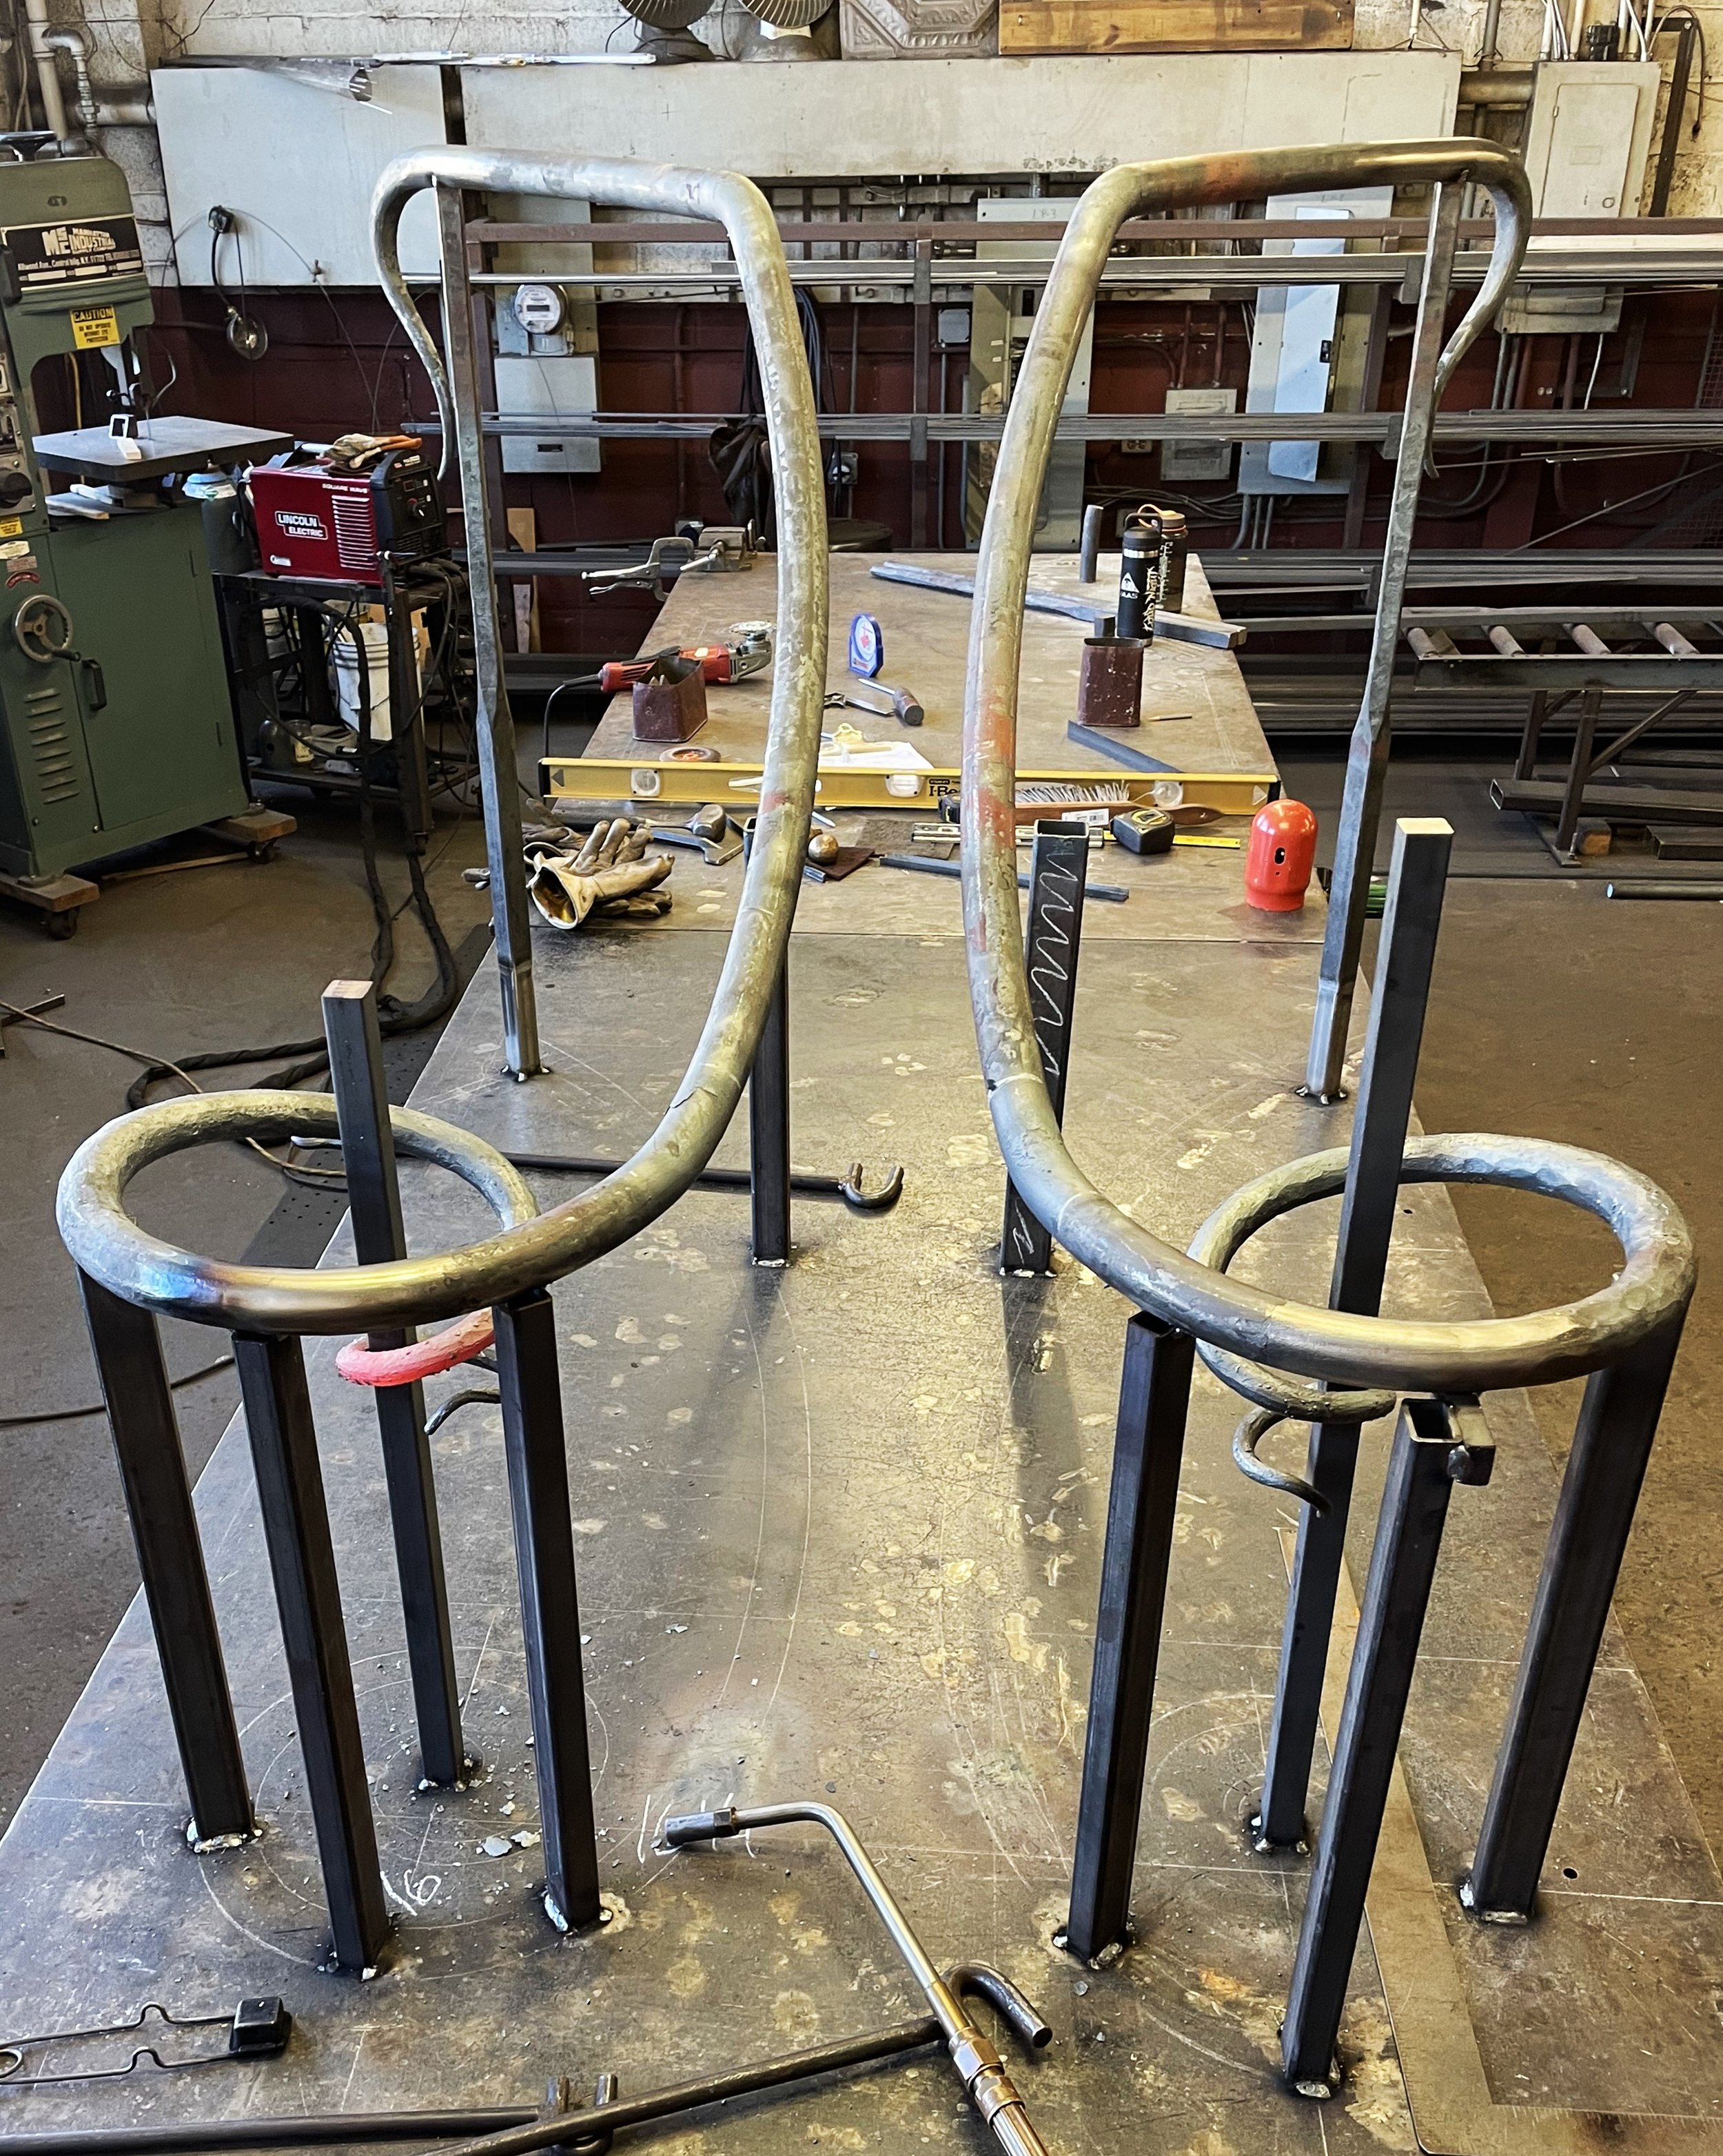
Here’s a sample of the range of railings Kyle and his team created for this lovely property.

Ready to start designing your own custom railing? We are currently booking for this coming fall. Reach out and let’s chat!

Forged Bronze Cross with Lilies

Some our readers may remember Kyle and his team created a double-leaf tree gate for a local church a few years ago. They reached out to us again when they were ready for the next phase of their courtyard redesign. This part of the project included the creation of a decorative bronze cross.

{Click or tap images to enlarge.}

Forging the lilies was the most intricate part of this project. In the last photo above, you can see some of the process. Kyle starts with a billet of bronze, then forges that out into a sheet. From there he forges the flower itself.

Below you can see photos of the finished cross and lilies. The first two photos are at our old studios in Richmond. The last one shows the piece installed in the church’s courtyard garden.

Processional Cross

The pastor of a local church recently visited our booth at a craft show. After taking it all in, he realized our work in metal and mosaic was just what he needed for a special project. His church was about to celebrate their 50th anniversary, and they were hoping to commemorate the event with a new processional cross.

The first step in designing the cross was to visit the beautiful sanctuary of the church. We noticed several elements that we incorporated into the final design, including the golden color of bronze, radiating lines, and the colors and style of the stained glass window over the altar. For the final design, we settled on a bronze cross with a crown of thorns around the arms of the cross. The center of the cross would be translucent mosaic.

To begin the project, we had to create stock for the bronze cross. Unlike other metals, there aren't many stock sizes available for bronze. To get the specific size we needed for the cross, we fabricated it from bronze sheet metal. 

We used our life-size drawing of the cross to make a hard template from MDF. We were then able to fabricate the bronze frames around the hard template. Eventually the three frames would sandwich the acrylic that would support the mosaic.

Next we twisted two thin strands of bronze round bar around each other to create the crown in four sections. The thorns were forged separately from bronze and welded in place.

The completed and polished cross with the acrylic installed and waiting on the mosaic.

The octagonal base with curved sides was designed to fit with existing elements in the church. This is a complicated shape to fabricate. To determine the correct size for each panel, we created a series of templates and test runs, first in paper and then aluminum. Once satisfied with the results, we transferred the pattern to the bronze. The final eight bronze sections were shaped, welded into place, and polished to a bright finish.

Finally it's time for the mosaic! Using the life-sized drawing, we traced the shape of the figure onto the acrylic. The style of the figure was drawn from existing images of Christ in the sanctuary. Rather than overtly placing the figure on the cross, we suggested the shape of a body through grout lines. The color selection of the mosaic draws on the red cross and blue background of the stained glass window. We worked with material that was translucent so that, unlike most mosaics, the cross transmits light. Once the first side was glued in place, we flipped it over and repeated the design exactly on the back to keep the colors unmuddied. Last of all, we grouted the mosaic on each side.

The cross frontlit and backlit. Frontlit, the lines of the figure show through, and light glints off the mirror-back and iridized material. Backlit, light glows through the transparent material. The ever-changing relationship of light with mosaic is one its most appealing qualities, but it also makes it nearly impossible to capture in a photo!

The completed processional cross in our studios. The staff was turned by a member of the congregation. We delivered the cross just in time for it to be dedicated during the Easter morning service.